SSI Tools for Microsoft Project

User guide

×
Menu
Index

Change Recorder Details Pane

 
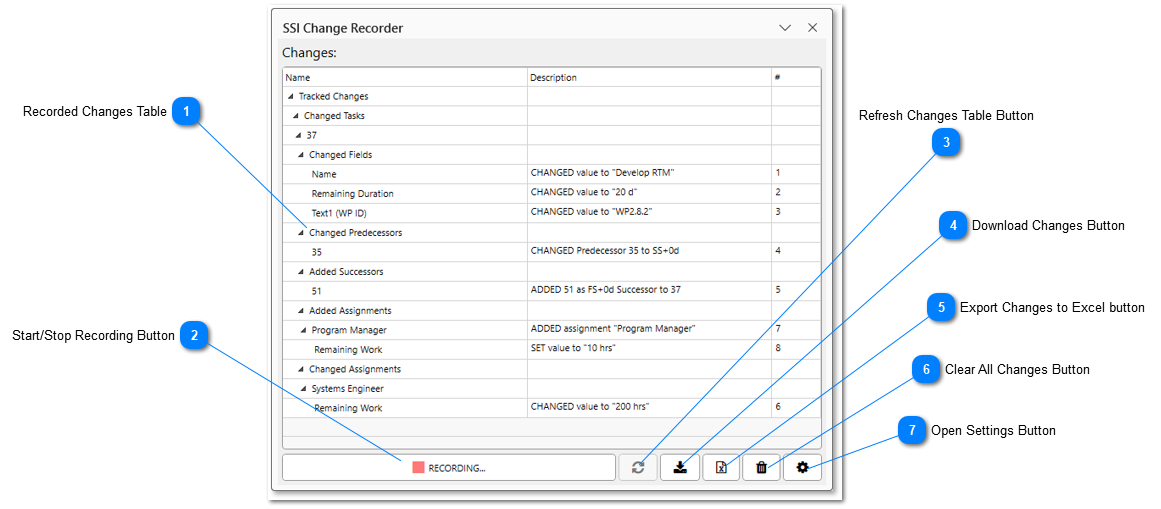
The Change Recorder Details Pane will allow you to view changes that have been captured by the Change Recorder, along with several other features.
 
Change Recorder Details Pane
1

Recorded Changes Table

1. Recorded Changes Table
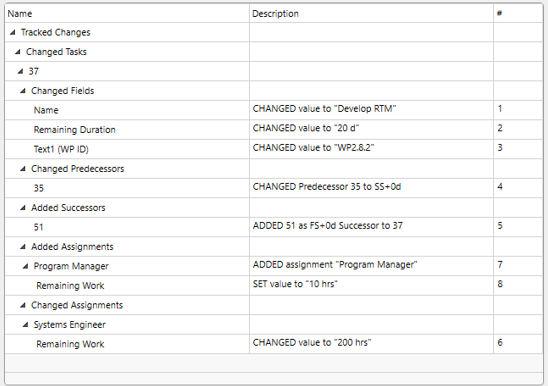
The main feature of the Change Recorder Details Pane is the list of changes that have been recorded. This will show you all changes the Change Recorder has captured so far in the current project. There are two columns in the table:
  • The Name column will show the Tracking Unique ID of any task that has been changed, as well as what things have been changed about that task. Note that any added tasks will not show a normal Tracking Unique ID value, instead they will be assigned a random GUID by the Change Recorder. This is necessary to be able to import added tasks properly.
  • The Description column shows a written description of the change that occurred, for example, "CHANGED duration from 15 days to 20 days" communicates that the duration value has been changed from it's original value of 15 to 20 while recording was on.
  •   The # column displays the chronological order in which changes were recorded, with 1 representing the first recorded change.
2

Start/Stop Recording Button

This button will either start or stop recording changes

.

 
When changes are not being recorded, the button will look like this:
Clicking the button will start recording changes.
 
When changes are being recorded, the button will look like this:
2. Start/Stop Recording Button
Clicking the button will stop recording changes.
3

Refresh Changes Table Button

3. Refresh Changes Table Button
Clicking this button will refresh the Recorded Changes Table. If there are no new changes to refresh the list with, this button will be disabled.
4

Download Changes Button

4. Download Changes Button
Clicking this button will immediately compile all of the current recorded changes into a .tcs (trackedchanges) file. This file can then be distributed and used by the Change Importer tool to recreate the changes.

5

Export Changes to Excel button

5. Export Changes to Excel button
Clicking this button will immediately export all of the current recorded changes into an Excel workbook.
6

Clear All Changes Button

6. Clear All Changes Button
Clicking this button will clear the Recorded Changes Table and remove all current recorded changes from memory.
7

Open Settings Button

7. Open Settings Button
Clicking this button will open the Change Recorder Settings form. Note - the Change Recorder Settings can only be opened when recording is turned off.
Made by Dr.Explain, software documentation tool