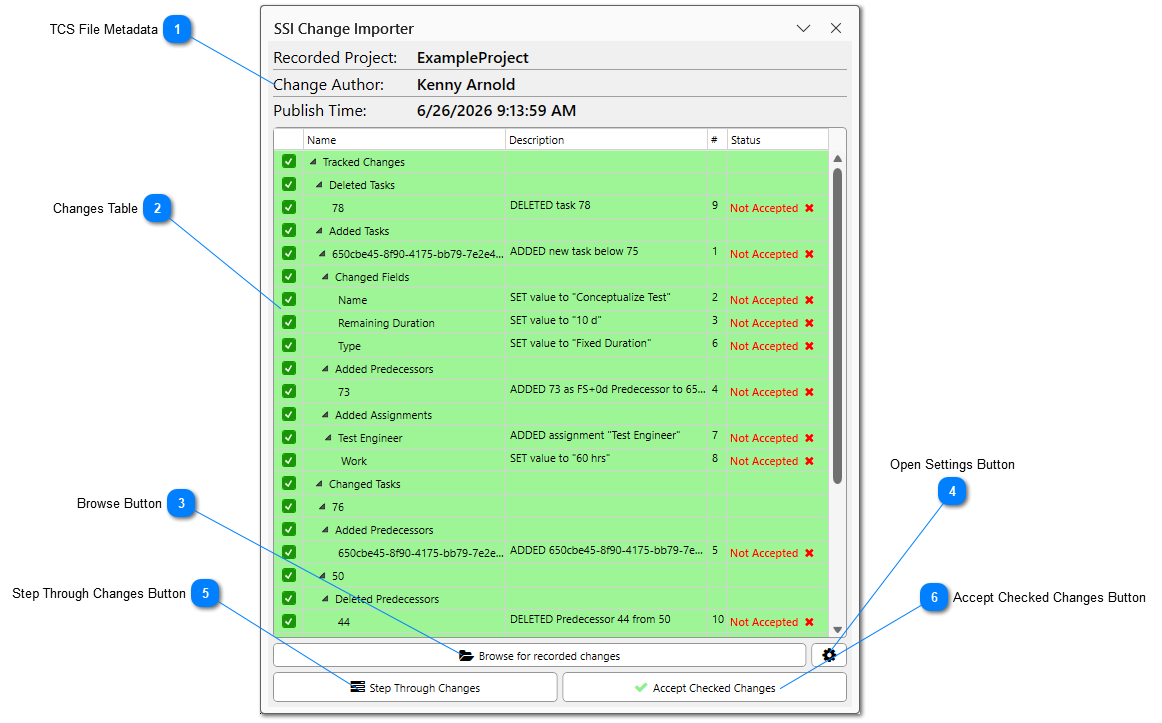
The Changes Summary Page displays all of the changes that can be accepted from the Change Importer. From this page, users can pick and choose what changes they would like to accept, and either accept all selected changes at once or meticulously walk through each change one step at a time.
TCS File Metadata
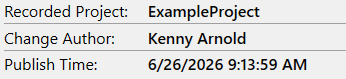
This area shows the metadata of the .tcs file selected to import changes from. This includes the following:
The name of the Project file that changes were recorded in.
The author of the changes (individual who made the changes and created the .tcs file).
The Changes Table displays the list of all changes that can be accepted in the active project file. There are four columns that are displayed in this table:
• The first column displays a checkbox control that allows you pick and choose which changes you would like to import.
• The Name column displays Rollups of changes and the displays the Tracking Unique ID of tasks that have recorded changes. For newly added tasks, this column initially displays a GUID instead of a Tracking Unique ID. The GUID uniquely identifies the task until it has been imported into the target project, at which point it is replaced with its assigned Tracking Unique ID.
• The Description column displays a written description of the change that occurred, for example, "CHANGED duration to 20 days" communicates that the duration value was changed from its original value to 20.
• The # column displays the chronological order in which changes were recorded, with 1 representing the first recorded change.
• The Status Column displays the current status of the change. Changes that have not yet been imported into the project are have a status of Not Accepted. After a change has been successfully imported, its status is updated to Accepted.
Clicking this button will open a File Explorer and allow you to browse to a different .tcs file. Note - if you browse to and select a different .tcs file, the Changes Table will be completely refreshed and only display the changes from the most recent file browsed to.
Clicking this button will allow users to walk through changes displayed in the Changes Table one step at a time. This can be useful if you want to analyze the impact of a change before it is accepted.
Clicking the Accept Checked Changes button will cause the Change Importer to begin replicating all the changes that are checked in the Changes Table in the active project. changes are replicated in the same order in which they were originally recorded. If a change can be successfully recreated, its status will change to Accepted. If not, it will remain as Not Accepted. SSI recommends you save a copy of the project prior to clicking this button just in case something is not imported correctly.
If you intend to accept changes made to an added task or resource assignment, be sure to also select the corresponding Add Task or Add Assignment change. Otherwise, subsequent changes associated with that item cannot be applied because the item will not yet exist in the target project.